首次接触,首先这个词Zabbix有点儿拗口,英语菜鸟级恼火啊,有道翻译又没有这个词的发音,不知道怎么读,最后发现bix有发音,zab就跟lab一样来读吧,/zæb/,就“泽波比克斯”吧。
官网:
https://www.zabbix.com/cn/
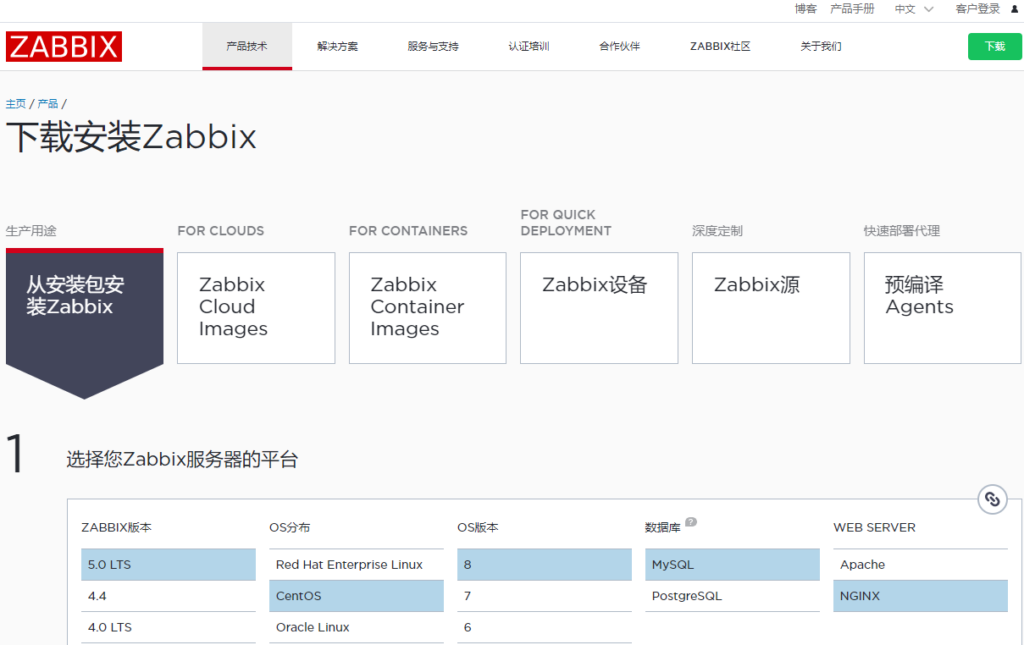
直接有中文界面还是挺不错的,至少说明挺重视中国区用户的。站点用户体验也好,直接右上角“下载”,选择自己的环境后,所有的安装步骤都一目了然了,都没什么可说的了,如图。
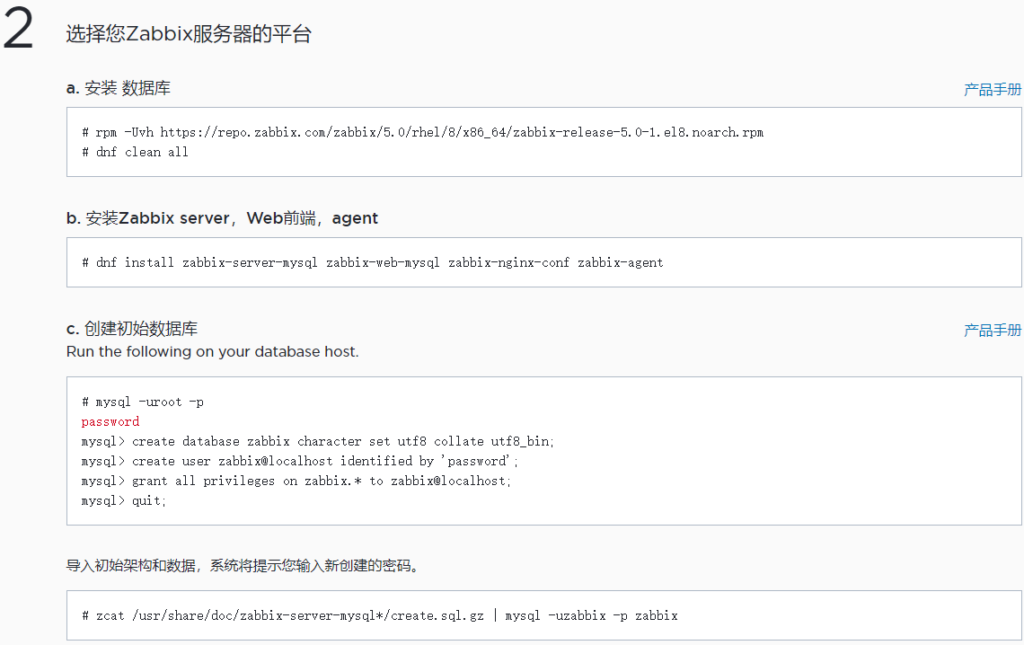
a. 安装 数据库
# rpm -Uvh https://repo.zabbix.com/zabbix/5.0/rhel/8/x86_64/zabbix-release-5.0-1.el8.noarch.rpm
# dnf clean all
b. 安装Zabbix server,Web前端,agent
# dnf install zabbix-server-mysql zabbix-web-mysql zabbix-nginx-conf zabbix-agent
c. 创建初始数据库
Run the following on your database host.
# mysql -uroot -p
password
mysql> create database zabbix character set utf8 collate utf8_bin;
mysql> create user zabbix@localhost identified by 'password';
mysql> grant all privileges on zabbix.* to zabbix@localhost;
mysql> quit;
导入初始架构和数据,系统将提示您输入新创建的密码。
# zcat /usr/share/doc/zabbix-server-mysql*/create.sql.gz | mysql -uzabbix -p zabbix
d. 为Zabbix server配置数据库
编辑配置文件 /etc/zabbix/zabbix_server.conf
DBPassword=password
e. 为Zabbix前端配置PHP
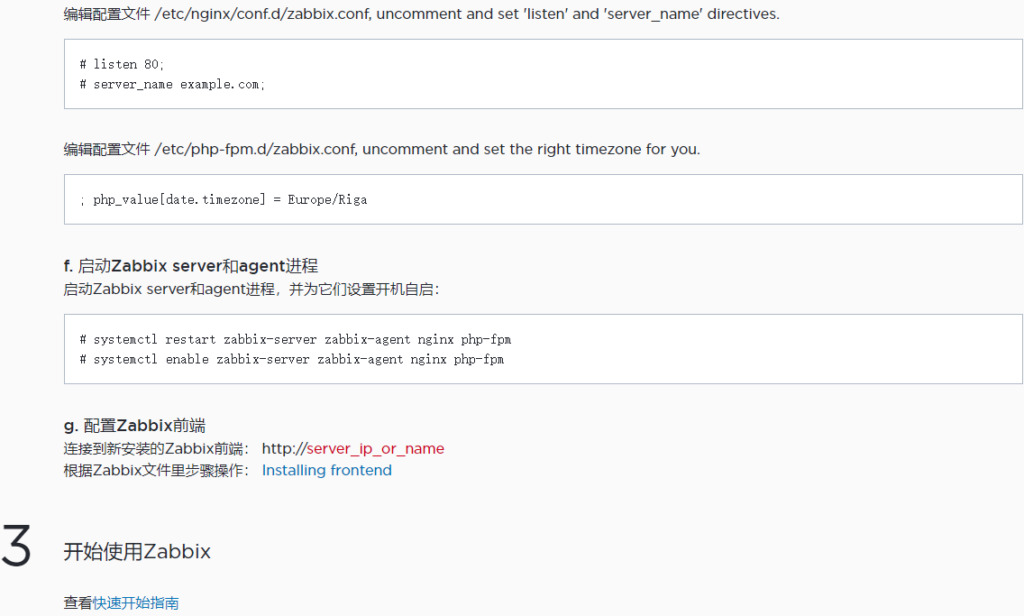
编辑配置文件 /etc/nginx/conf.d/zabbix.conf, uncomment and set 'listen' and 'server_name' directives.
# listen 80;
# server_name example.com;
编辑配置文件 /etc/php-fpm.d/zabbix.conf, uncomment and set the right timezone for you.
; php_value[date.timezone] = Europe/Riga
f. 启动Zabbix server和agent进程
启动Zabbix server和agent进程,并为它们设置开机自启:
# systemctl restart zabbix-server zabbix-agent nginx php-fpm
# systemctl enable zabbix-server zabbix-agent nginx php-fpm
g. 配置Zabbix前端
连接到新安装的Zabbix前端: http://server_ip_or_name
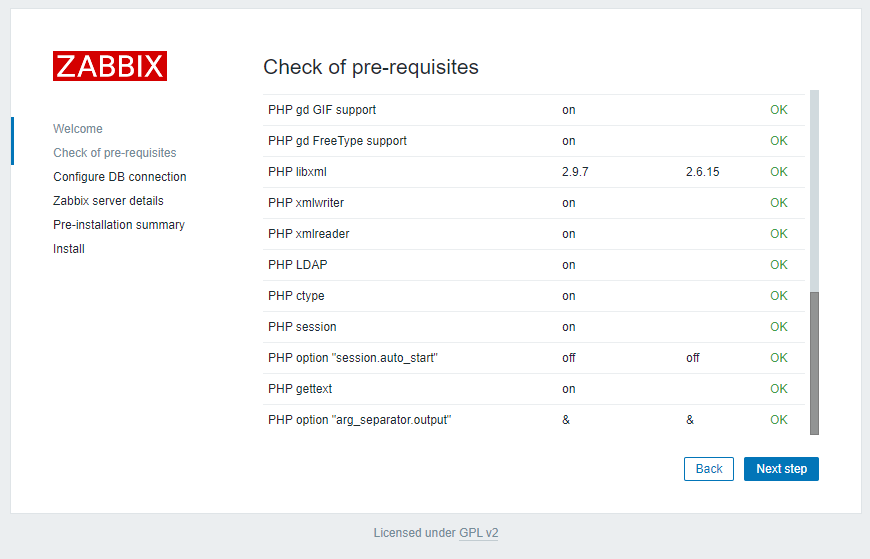
根据Zabbix文件里步骤操作: Installing frontend详细安装步骤都有了,那就重点记下安装步骤中的如果出现的错误及解决方法吧。说明一下,这里使用root用户来安装,普通用户估计错误就更多了,第一次还是交给root。
错误一:下载软件包出错,步骤b未顺利完成。
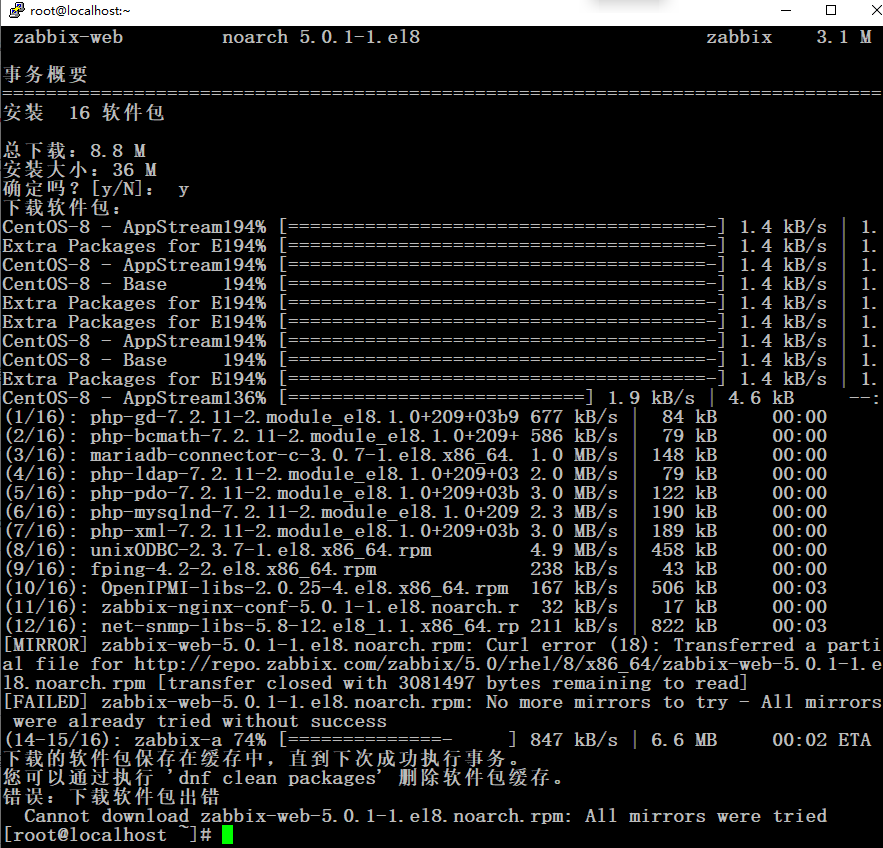
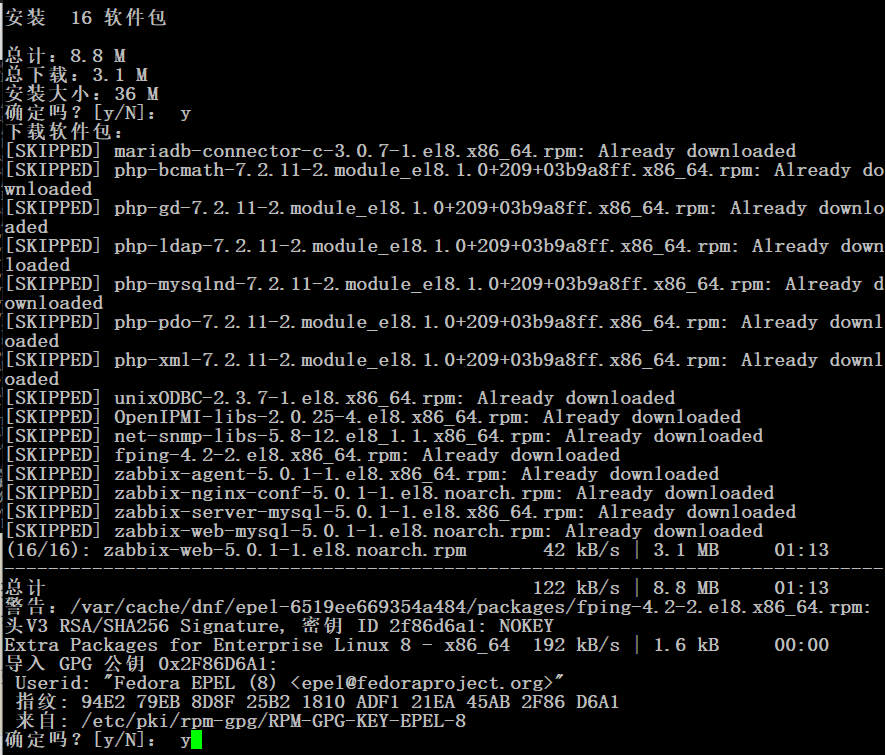
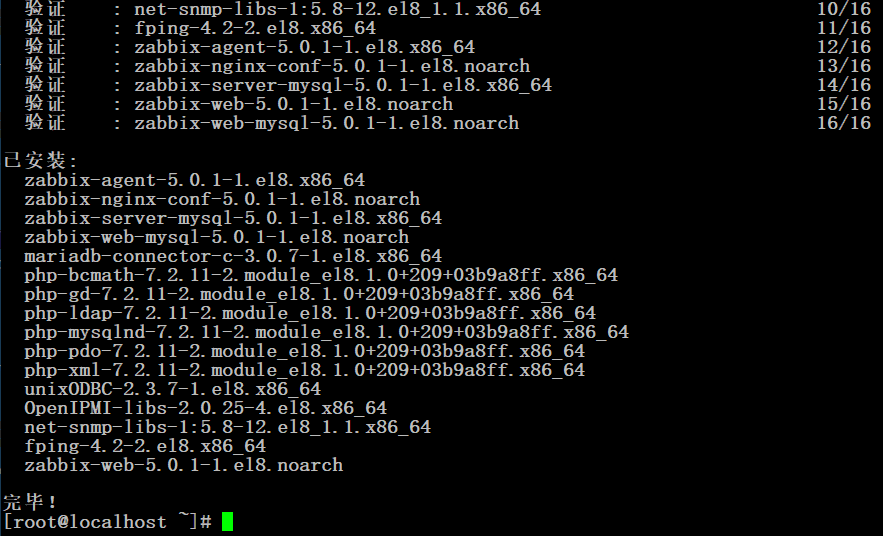
根据错误提示,应该是网络问题,仔细观察每次可以到70%多出错,所以步骤b安装命令多尝试几次就可以解决。接下来输入几个y就可以顺利完成。
错误二、步骤c进入MySQL操作,又是一个小错误,password部分为新设置的密码。不能过于简单。如果默认不改就会报错如下图,因为密码太简单了。

补充:根据下面的经验,如果php版本低于7.3,这里语句可以加一句,如下:
mysql> create user zabbix@localhost identified by 'password';//最后的password改成复杂一点的密码。

mysql> create user zabbix@localhost identified WITH mysql_native_password by 'password'; //改后
然后执行步骤c的最后一步导入数据,这里要输入前一步设置的密码。
错误三:重启进程时报错,说明前面哪个配置出现了问题。
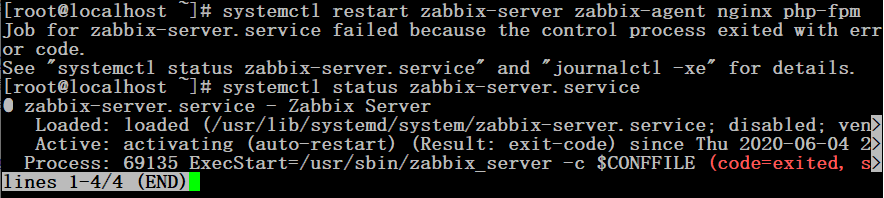
但是,此时打开配置时的url地址,zabbix的安装界面可以正常显示的。不知道哪里出了问题咯。

根据错误提示,找了一下原因,首先定位到可能是防火墙或者SELinux的原因,查看firewalld状态是开启的,临时stop,再运行依旧错误,然后重启firewalld,因为与它是无关的了。再临时关闭SELinux,使用命令setenforce 0临时关闭,再次运行正常,没有错误提示了。就是它的原因了。
# systemctl status firewalld
# systemctl restart zabbix-server zabbix-agent nginx php-fpm
依然报错
# systemctl start firewalld
# getenforce
# setenforce 0
# systemctl restart zabbix-server zabbix-agent nginx php-fpm
正常启动,继续完成步骤f
# systemctl enable zabbix-server zabbix-agent nginx php-fpm
到这里基本上就结束了,再配置前端,步骤g
错误四:数据库连接失败
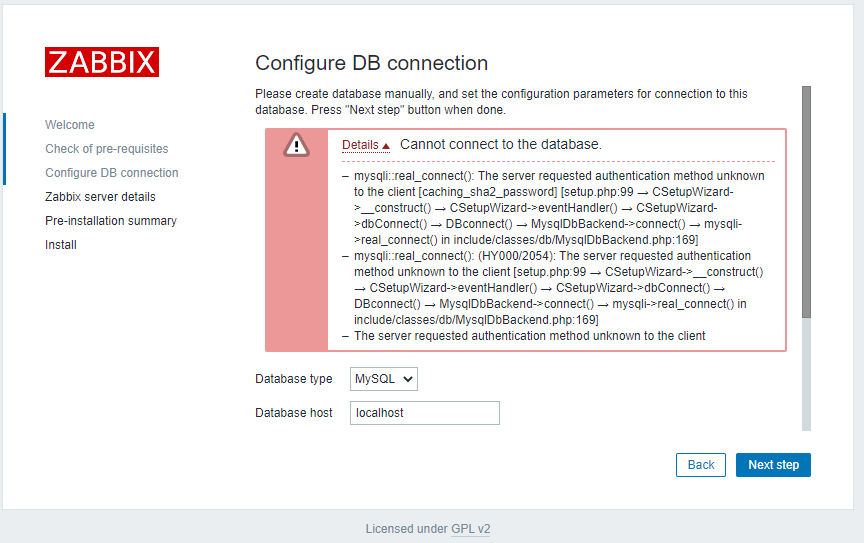
Details Cannot connect to the database.
mysqli::real_connect(): The server requested authentication method unknown to the client [caching_sha2_password] [setup.php:99 → CSetupWizard->__construct() → CSetupWizard->eventHandler() → CSetupWizard->dbConnect() → DBconnect() → MysqlDbBackend->connect() → mysqli->real_connect() in include/classes/db/MysqlDbBackend.php:169]
mysqli::real_connect(): (HY000/2054): The server requested authentication method unknown to the client [setup.php:99 → CSetupWizard->__construct() → CSetupWizard->eventHandler() → CSetupWizard->dbConnect() → DBconnect() → MysqlDbBackend->connect() → mysqli->real_connect() in include/classes/db/MysqlDbBackend.php:169]
The server requested authentication method unknown to the client
错误关键信息caching_sha2_password,这是因为mysql8以上验证方法发生了改变,而php7.2还不支持,大概有两种修改方法:
- 最好的可能还是直接升级php吧,不过就相对麻烦一点。
- 或者修改MySQL的验证方法,回到以前的验证方法,需要在 MySQL 的配置文件 my.cnf 中,设置 default_authentication_plugin=mysql_native_password,但既然选择升级版本中放弃肯定有其道理的,所以觉得最好还是更新php吧。
- 这里暂时按方法二来改,有时间再升级php。
# vi /etc/my.cnf    //可以找到mysql_native_password这句,去掉前面的#号就可以保存了。
# systemctl restart mysqld php-fpm    //到这里还是不行,因为之前创建的数据库用户信息没有更改
# mysql -uroot -p    //登录数据库root用户
password
mysql> use mysql;
Reading table information for completion of table and column names
You can turn off this feature to get a quicker startup with -A

Database changed
mysql> SELECT Host, User, plugin from user;
+-----------+------------------+-----------------------+
| Host      | User             | plugin                |
+-----------+------------------+-----------------------+
| localhost | mysql.infoschema | caching_sha2_password |
| localhost | mysql.session    | caching_sha2_password |
| localhost | mysql.sys        | caching_sha2_password |
| localhost | root             | caching_sha2_password |
| localhost | zabbix           | caching_sha2_password |
+-----------+------------------+-----------------------+
5 rows in set (0.00 sec)
mysql> ALTER USER 'zabbix'@'localhost' IDENTIFIED WITH mysql_native_password BY 'password';
mysql> SELECT Host, User, plugin from user;
+-----------+------------------+-----------------------+
| Host      | User             | plugin                |
+-----------+------------------+-----------------------+
| localhost | mysql.infoschema | caching_sha2_password |
| localhost | mysql.session    | caching_sha2_password |
| localhost | mysql.sys        | caching_sha2_password |
| localhost | root             | caching_sha2_password |
| localhost | zabbix           | mysql_native_password |
+-----------+------------------+-----------------------+
5 rows in set (0.00 sec)
mysql> quit;
Bye
# systemctl restart mysqld php-fpm
这样就可以继续下一步了。
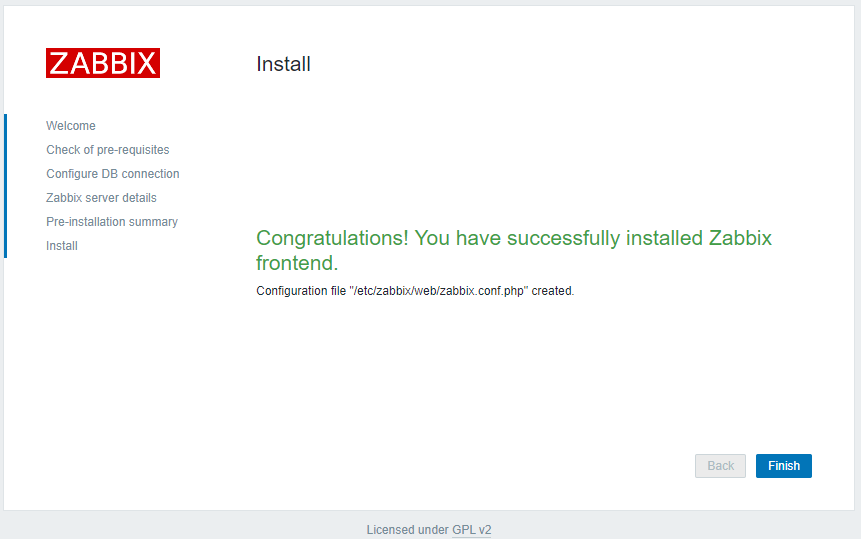
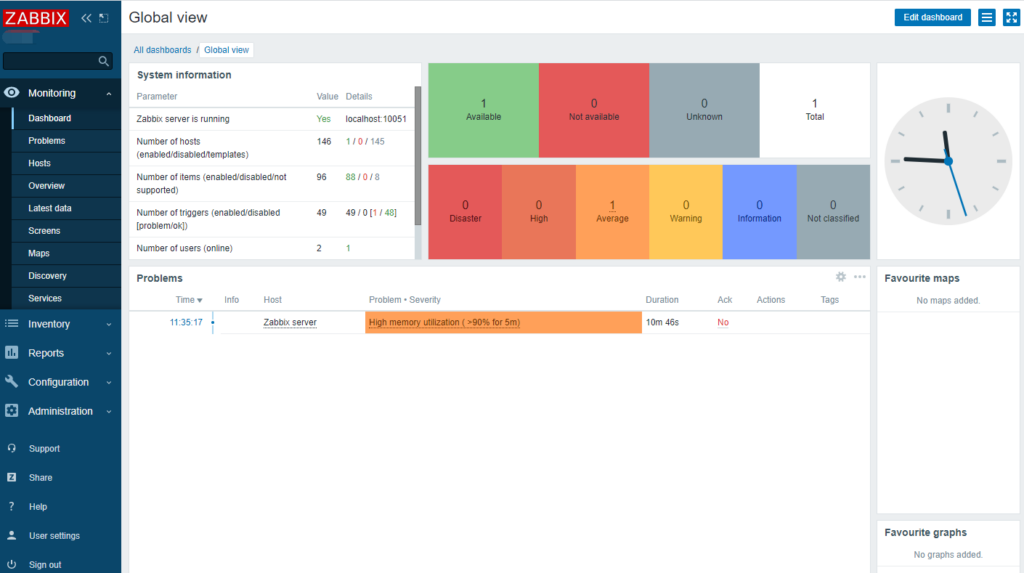
完成就进入登录界面,这里还有最后一个错误五:
登录用户默认为Admin/zabbix,一定要注意是区分大小写的,用户名Admin,admin进不去的哦。